Roughs to Riches
Ever wondered what the process is to get great looking digital illustrations that are pleasing to the eye, crisp, balanced and generally looking dang hot? Well I don't have all the secrets nor do I think I'm anywhere near perfection (mostly because perfection is boring) but I can provide some info on my process and how my work flow happens.
If you're a new client that wants to know how long the illustration you're getting me to do will take, what's involved and how the illustration will look at each stage, this is for you. If you're a budding digital illustrator wondering how to get more out of your images and enhancing your process, this is also for you!
The illustration we'll work through is a poster I created for a gala ball. The process you will see, shows the initial rough transforming, growing, adapting and changing dramatically from the initial conception, yet still keeping the same basic idea.
STEP 1: The Rough
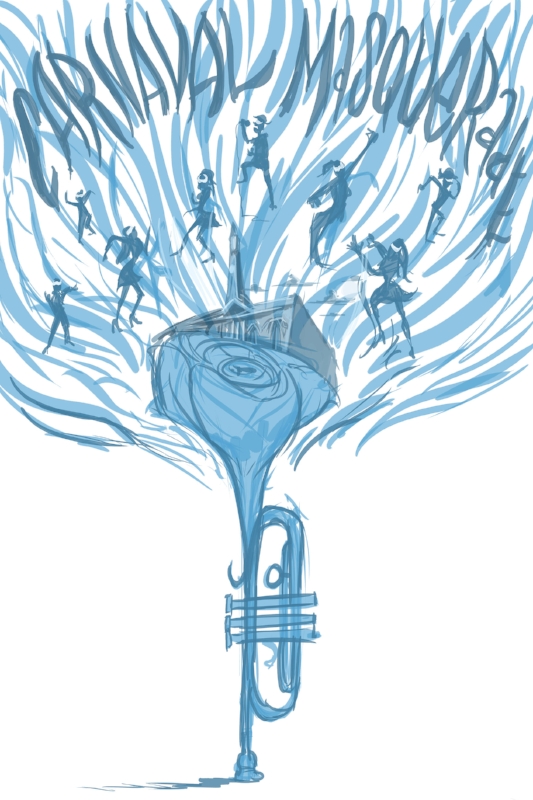
This is the initial conception of the idea. This is developed after a lot of VERY rough sketching, research into the topic and studies of the elements I might like to include.
STEP 2: The Colour Palette

Step 2 is the creation of a palette that I will work with, following a discussion with the client about what colours might work. Having this early on helps me to visualise the look, feel and temperature of the piece.
STEP 3: Layout

This is the start of what will become the final piece. Here, I am establishing the basic layout of the piece.
STEP 4: Starting the Detail

Beginning the detail with a sketch that is still rough, helps to slowly refine the look and get the best possible outcome.
STEP 5: Outline

Now this is where things really start to take shape.. literally. This is the outline that will be used as the final piece, it's a long process, but it gets fun around now. When the full outline is done, it's a good time to reflect on the illustration and check in for any edits. After this point, editing can be tricky and can mess up the illustration quite a bit.
STEP 6: Colour Blocks

In step 6, the blocks that will become the backing colour very soon have now been applied to the piece.
STEP 7: Additional Objects

There were a few other items that needed to be included in the piece as per the client's brief. I wanted to get the main focus and structure (the rose, trumpet and flames) done first. Then adding the mask and building after, so that they don't steal focus or alter the balance.
STEP 8: Colour
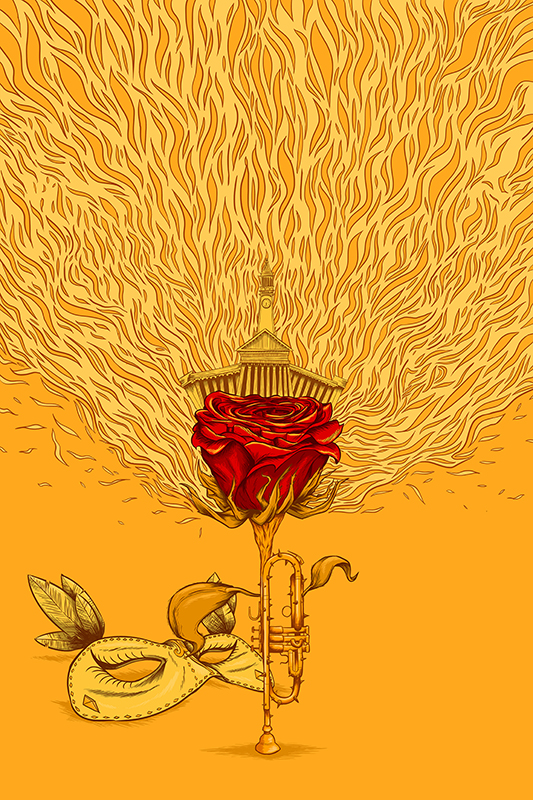
BAM! And just like that there's colour! Actually it's a lot more of a painstaking process than just 'bam'. Trial and error, changing colours, deciding which colour is the focus colour, what works with what, etc. etc. etc. I have also added in some shading and light to bring a more 3 dimensional aspect to the illustration.
STEP 9: Lettering

Adding in some hand drawn lettering to match the flow and vibrance of the piece. I also have to ensure this is the focal point of the text, as it is the title of the event.
STEP 10: Final Product

Add some more info in text form and VOILA! You have a final piece of beautiful illustration filled with effort, lots of coffee and quite a few hours of work.
